/ Gohigh Level
Curious about how to build effective sales funnels? With GoHighLevel, an all-in-one sales and marketing platform, you can easily create and manage powerful funnels using its built-in funnel builder. Thanks to its intuitive drag-and-drop interface, which makes designing a funnel is simple and fast. Whether you want to start from scratch or use pre-built templates, GoHighLevel gives you full flexibility. One major advantage? You can create unlimited sales funnels. Plus, you can seamlessly integrate your funnels with automated workflows, triggers, campaigns, and pipelines to streamline your marketing efforts. Prefer watching a walkthrough? Check out our in-depth video tutorial on building sales funnels in GoHighLevel, or keep reading this step-by-step guide.
Sales Funnels Explained: What is a Sales Funnel?
A sales funnel is a visual map of your customer’s journey, from the moment they discover your brand to the point they make a purchase. It outlines each stage a lead goes through before becoming a paying customer. As more businesses recognize their power to boost leads, conversions, and revenue, the use of sales funnels is increasing day by day. A sales funnel is designed to build awareness, spark interest, create desire, and drive action. There are various types of funnels you can use depending on your business goals. Want to explore them? Don’t miss our detailed guide on the different types of sales funnels.
How to Create a Sales Funnel Using GoHighLevel
As mentioned earlier, a sales funnel consists of several stages that guide potential customers through their purchasing journey. These stages are often represented as individual funnel pages.
In this guide, I’ll walk you through the process of building a 3-step sales funnel in GoHighLevel, which includes the following key stages:
- Landing Page
- Lead Capture ( Form) Page
- Thank You Page
For a detailed walkthrough, check out our YouTube video that explains how to create a 3-step funnel in GoHighLevel.
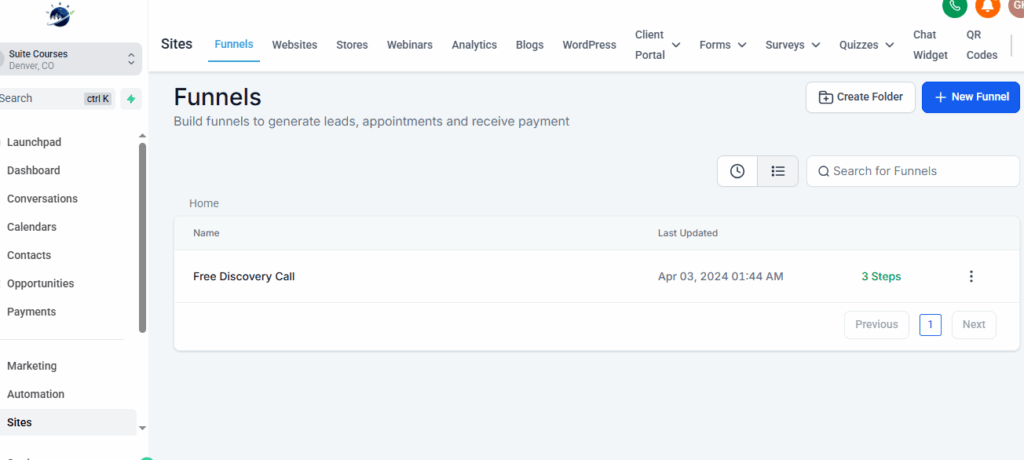
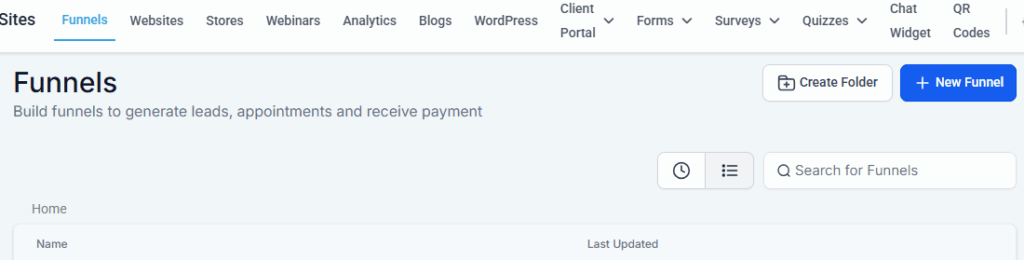
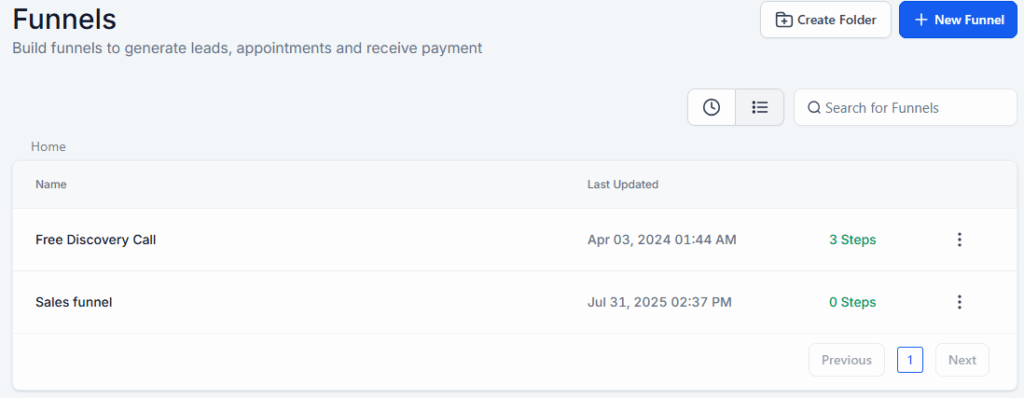
1) Open the Funnel Builder in your GoHighLevel dashboard
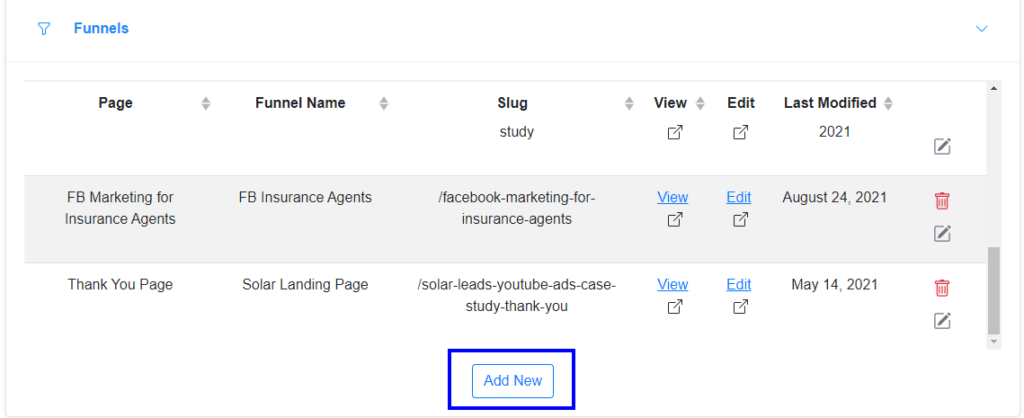
Log in to your GoHighLevel account and click on “Sites” in the left-hand menu. You’ll be directed straight to the “Funnels” tab. From here, you can view any existing funnels you’ve previously created or start building a new one. To keep things organized, GoHighLevel also offers a “Create Folder” option, perfect for grouping your funnels by type, project, or client.
2) Create a New Sales Funnel
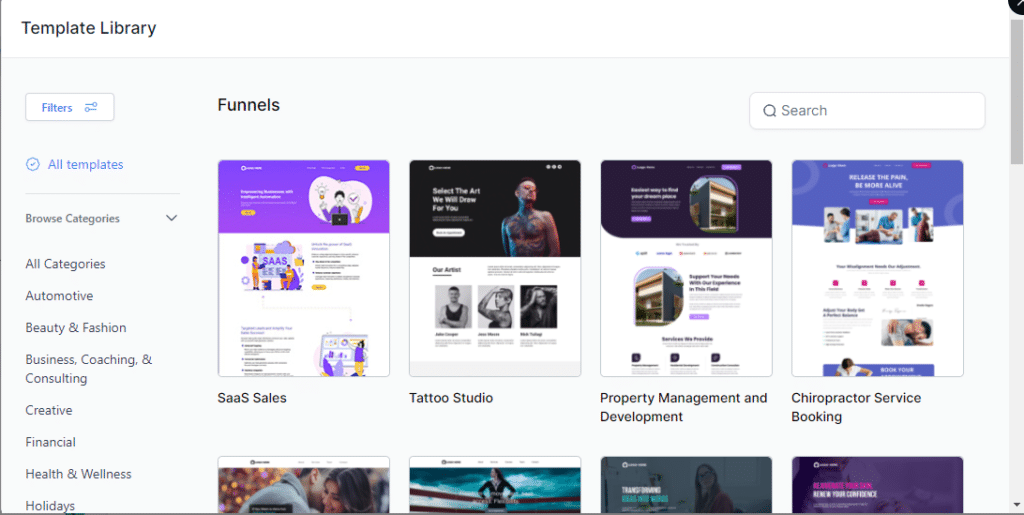
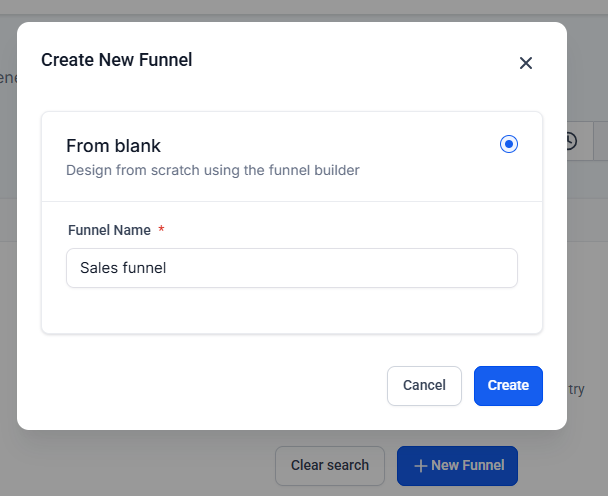
To start a new sales funnel, click on the “New Funnel” button. You’ll then have two options for creating your funnel.
- Start from Scratch: Select this option to build a custom funnel from scratch using the Funnel Builder.
- Use a Template: Choose a pre-designed funnel template and customize it to fit your needs using the Funnel Builder.

Create Funnels Using Templates: Building a funnel with templates is fast and straightforward. Once you select the “From Templates” option, you’ll be directed to GoHighLevel’s template library. From there, simply choose a pre-designed sales funnel and customize it to match your business goals and branding.
Create a Sales Funnel from Scratch: Select the “From Blank” option, enter a name for your funnel, and click “Create” to get started.
Your funnel is now created, and you’ll be redirected to the main funnel dashboard. The next step is to start adding pages (or steps) to your funnel. To locate your newly created funnel, scroll through the list under the Existing Funnels section or use the search bar to find it by name.
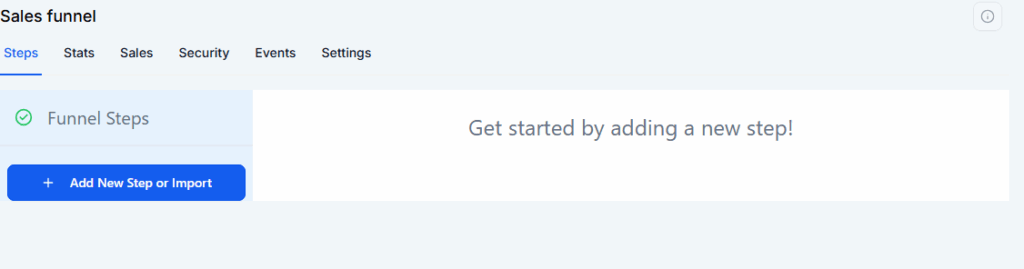
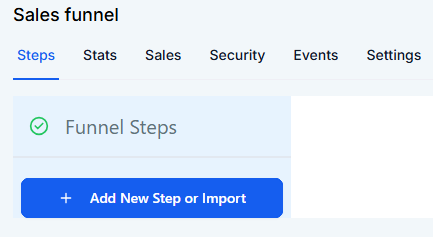
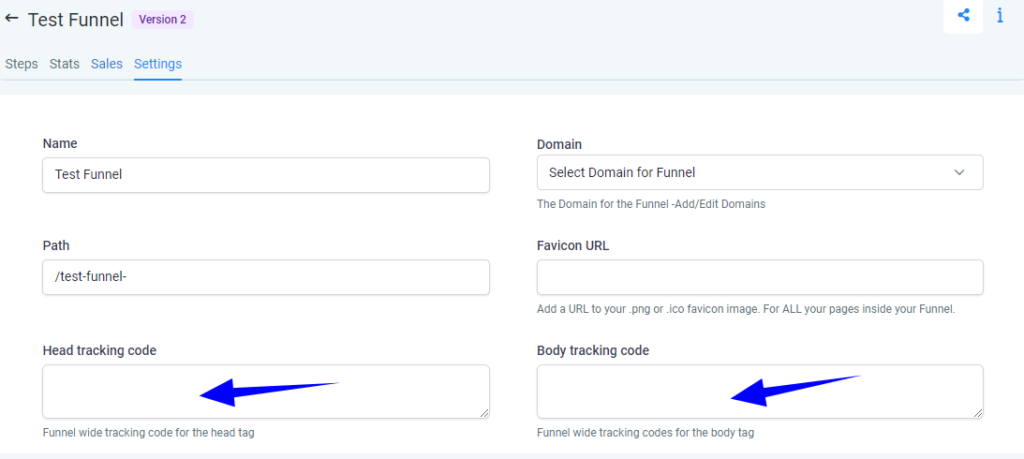
Click on the name of your funnel (in our example, “Test Funnel”). Once selected, you’ll be taken into the funnel’s workspace. Here, you’ll find four main tabs that help you manage and customize your funnel:
- Steps: This tab allows you to add and manage the individual pages (or steps) within your funnel.
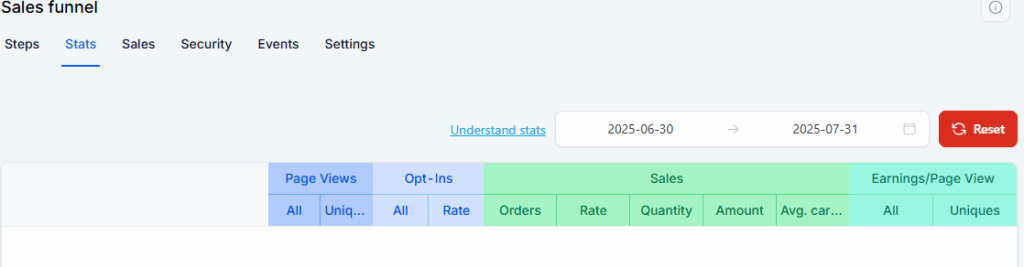
Stats: This tab displays the performance metrics of your funnel. It provides insights such as views, conversions, and conversion rates. Below is a screenshot showing the stats section from one of our existing sales funnels.
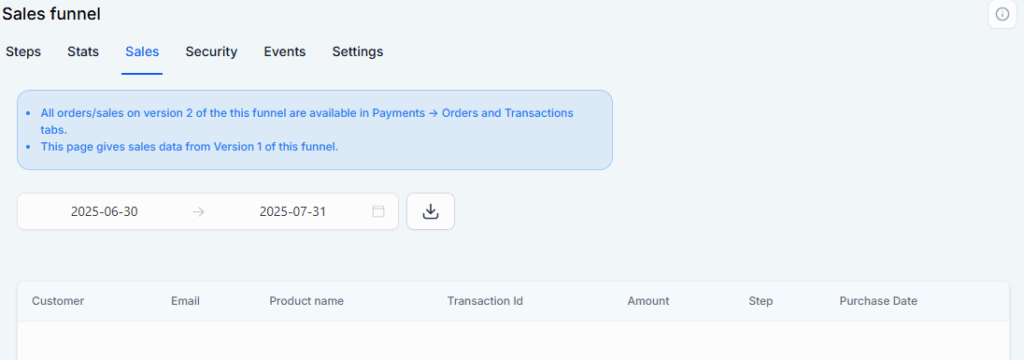
Sales: This section tracks any sales generated through your funnel, including payments received for products or services. Currently, this section is empty since no sales are being processed through this funnel at the moment.
Settings: This tab allows you to configure and customize all aspects of your funnel.
3) Build the Steps in Your Sales Funnel
To add steps to your funnel, click the green “Add New Step” button. Since we’re creating a 3-step funnel in this guide, you’ll need to click this button three times to add each step.
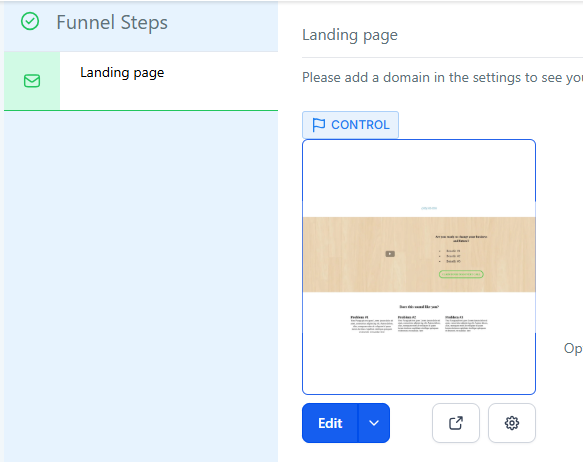
Create the Landing Page Step: The landing page serves as the entry point of your sales funnel; it’s where potential leads first arrive. You can design this page based on your specific goal or offer. For instance, the example below showcases a landing page built for capturing roofing leads.

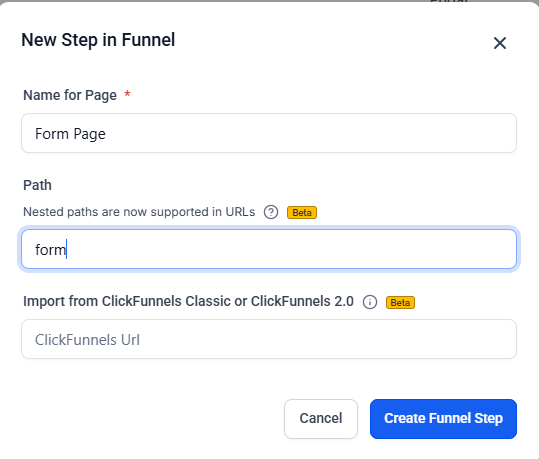
To create your landing page, click on “Add New Step.” A dialog box will appear prompting you to set up the new funnel step. Simply enter a name for the page and define the path (URL), then click “Create Funnel” to proceed.
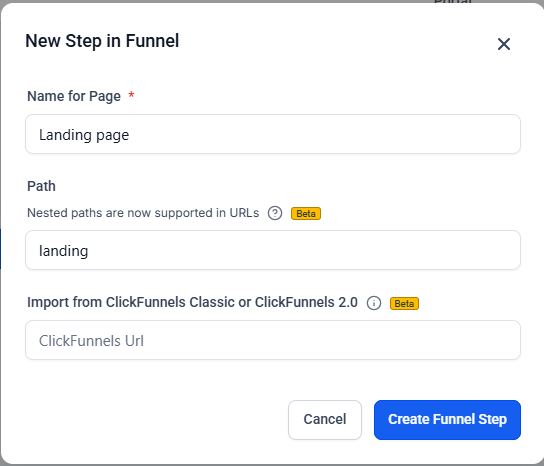
GoHighLevel also offers an option to import a page directly from ClickFunnels. To do this, simply paste the URL of the ClickFunnels page you want to import. Once the funnel step is created, you’ll see various customization options appear on the right-hand side. From here, you can begin building your page. Just like before, you’ll have two options to proceed:
- Use an Existing Funnel Page
- Start from Scratch
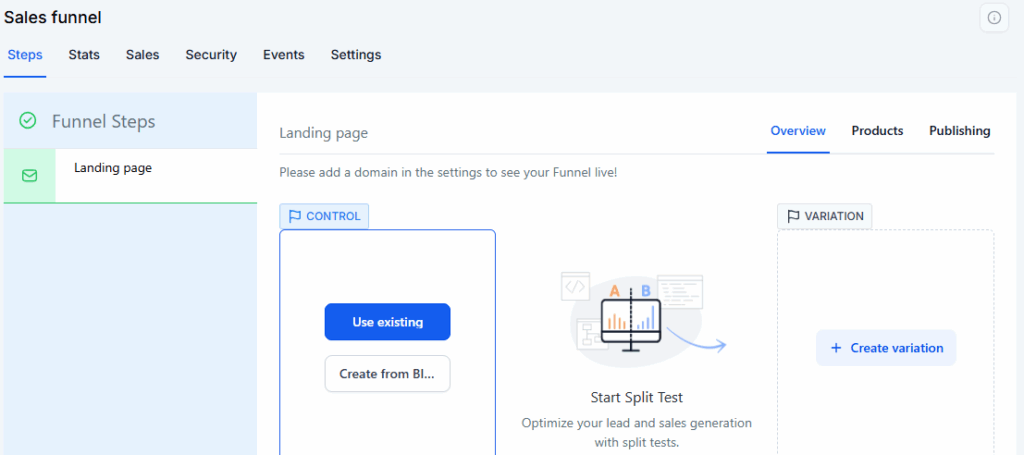
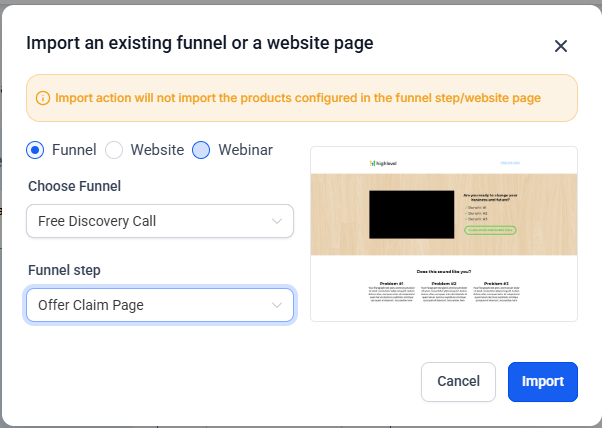
Create a Funnel Step Using Existing Pages: This method is a fast and efficient way to build your sales funnel. Simply click on the “Use Existing” option. Then, select whether you want to pull the page from an existing Funnel or Website. For example, choose “Funnel” to import a step from one of your previously created funnels. After that, just select the specific funnel and then the page you want to use, and click “Import” to add it to your current funnel.
Next, click the “Edit” button to begin customizing your page.
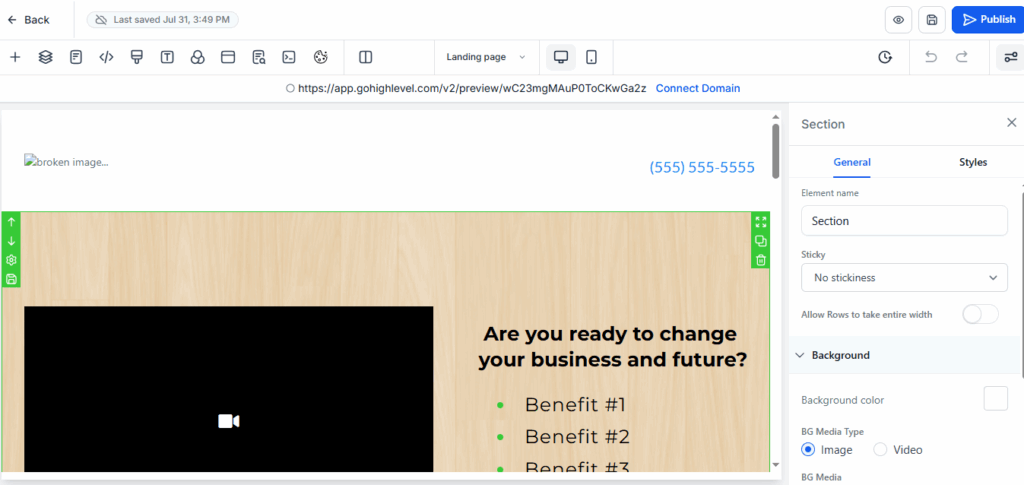
You’ll be taken to the Funnel Builder, where you can customize the page to suit your needs. Once you’ve finished making changes, click the “Save” button at the top to apply your updates.
When you import an existing sales funnel, its settings, such as SEO configurations and tracking codes, are carried over along with the content. To ensure everything aligns with your current campaign, it’s important to double-check these settings. Click on the Settings tab at the top of the page to review and update details, such as SEO metadata, tracking scripts, and other configurations, as needed.
Build Funnel Steps from Scratch
GoHighLevel’s Funnel Builder also allows you to create pages entirely from scratch. To do this, select the “Create From Blank” option. This will open the intuitive drag-and-drop editor, where you can design and customize your funnel page exactly the way you want.
Here are the key elements you’ll find inside the Funnel Builder:
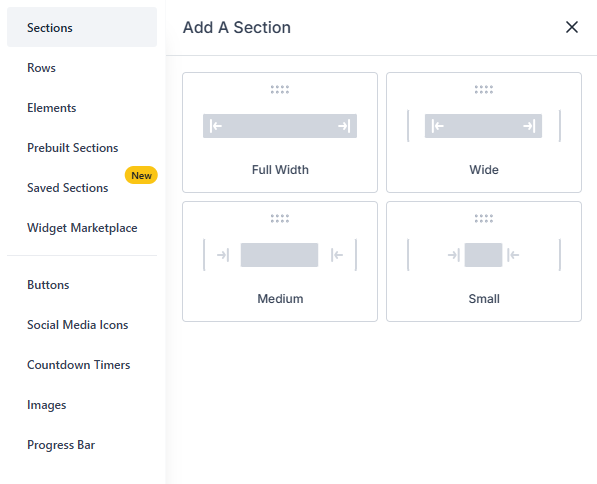
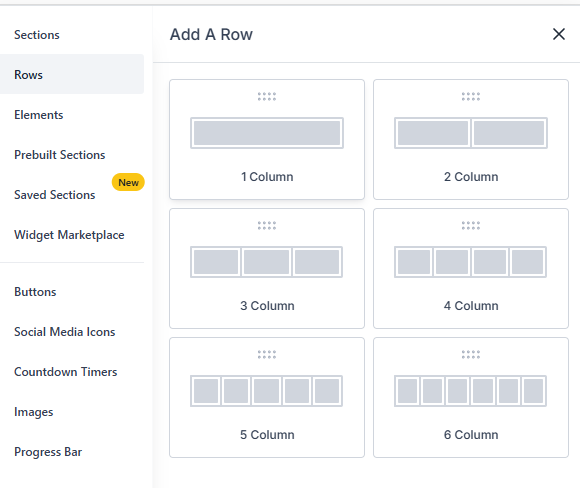
- Sections: Begin by adding sections to define the overall layout of your page. You can choose from layout options such as full-width, wide, medium, or small, depending on your design needs.
- Rows and Columns: After setting up your sections, add rows and columns to neatly organize your content within each section and maintain a clean, structured layout.
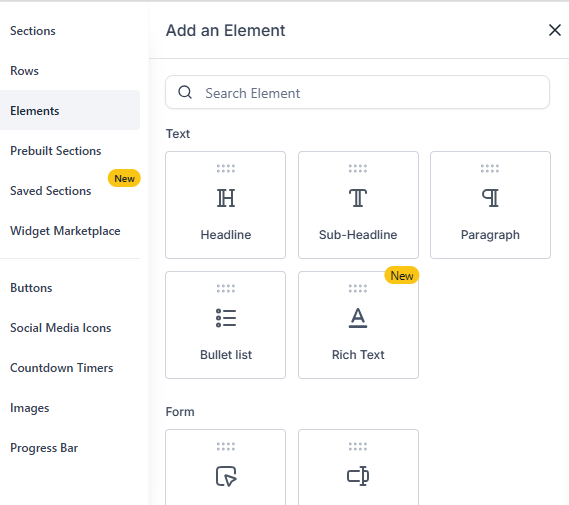
Add Elements: Enhance your page by adding various elements such as headlines, paragraphs, bullet lists, images, buttons, and more. These components help you build engaging and visually appealing funnel pages.
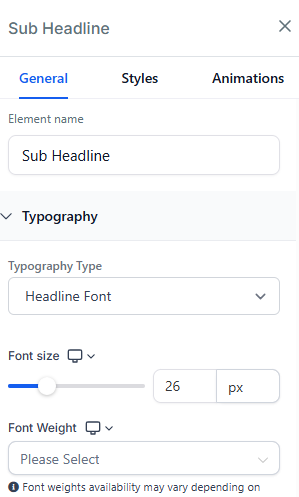
Customize Settings: Click on any section, row, column, or element to access its specific settings on the left-hand panel. From there, you can adjust the design and functionality to fit your needs. For example, selecting a headline will open its customization options such as font size, color, alignment, and more.
- At the top of the page, you’ll find a toolbar with several icons, including:
- Responsiveness: Use the device icons at the top of the page to preview how your funnel will appear on both desktop and mobile screens, ensuring a seamless user experience across all devices.

Settings: Within the Settings tab, you’ll find the following configuration options:
- SEO Metadata: Improve your page’s search engine visibility by adding relevant SEO metadata, including title, description, and keywords.
- Tracking Data: Insert tracking codes such as Google Analytics, Facebook Pixel, or other scripts to monitor and analyze your funnel page performance.
- Custom CSS: Add custom CSS code to further style and personalize your funnel page beyond the standard design options.
- Background: Customize the look of your page by selecting a background color or uploading a background image.
- Typography: Customize the font style and text color to match your brand’s look and feel across the page.
- Pop-Box: Use this option to add a pop-up box to your page for capturing leads, displaying messages, or highlighting offers.
- Undo/Redo: Quickly reverse or reapply recent changes while editing your page.
- </> Custom HTML: Insert your own HTML code to embed custom elements or third-party widgets into your page.
- Version: View and manage the version history of your page to track changes and restore previous edits if needed.
- Preview: View a live preview of your page before publishing to see how it will appear to visitors.
Save: Then make sure to save all your changes.
Depending on your requirements, you can add sections, rows, columns, and various elements to build your landing page. For a step-by-step walkthrough, feel free to watch our detailed YouTube video guide. Once you’ve completed designing your landing page, click “Save” to apply your changes. Then, use the back arrow at the top to return to your funnel’s main dashboard.
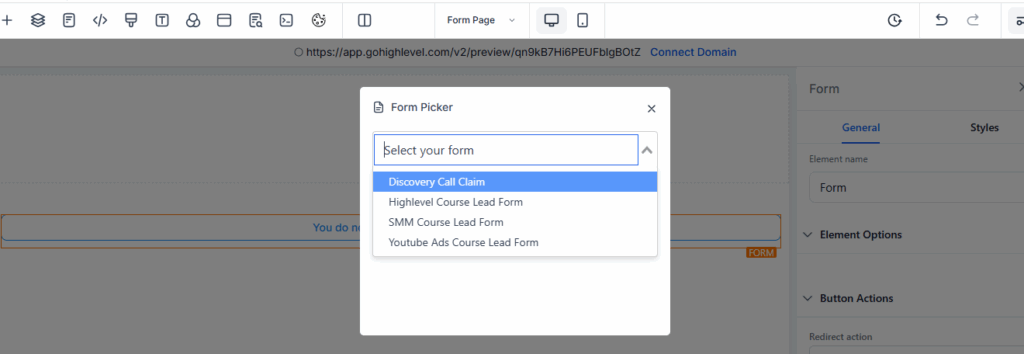
Build Your Form Page
The form page is the next step in building your funnel. Its primary purpose is to capture lead information through a form. Below is an example of a typical form page that we used to gather lead data.

Next, click on “Add New Step.” Enter the name of your page and the URL path; this time, name it “Form Page.” Then, click “Create New Funnel Step” to add it to your funnel.
Next, you can build your form page either by selecting an existing page or creating one from scratch. The process is similar to building the landing page described earlier. Since this is a form page, be sure to add a form element to capture lead information. To do this, click on “Add Element” and select the “Form” element.
After finishing your form page, click the “Save” button to apply your changes.
Create a Thank You Page: The thank you page is the final step in your sales funnel. Its main purpose is to acknowledge and thank leads who have completed the form on the previous page. Below is an example of one of our thank-you pages.

Once again, click on “Add New Step.” Enter the name and URL path for your page; this time, use “Thank You Page.” Then, click “Create New Funnel Step” to add it to your funnel.

Building the thank you page follows the same process as the previous two pages. You can either import an existing page or create one from scratch. Typically, a thank you page is simple, featuring a message to express your gratitude. Additionally, you may choose to include social media links, like we did in our guest blogging thank you page example, to encourage further engagement.
Publish and Activate Your Sales Funnel
After completing your sales funnel, the next step is to publish it to make it live. GoHighLevel offers multiple options for publishing your funnel. In this guide, we’ll walk you through how to publish your sales funnel both on a WordPress site and on a subdomain.
Step-by-Step Guide: Publishing Your Sales Funnel on a Subdomain
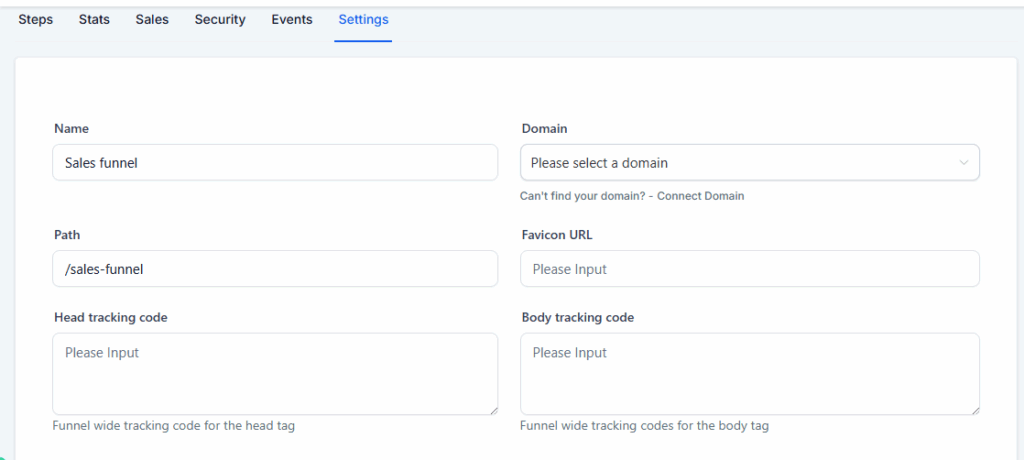
Open your sales funnel and navigate to the Settings tab. Then, click on the Domain dropdown menu, where you’ll find a list of all the domains you’ve added to your GoHighLevel account.

Select the domain where you want to publish your funnel, then click the Save button at the bottom of the page.
If you don’t see any domains listed in the dropdown, it means no domains have been added to your GoHighLevel account yet. In that case, you’ll first need to add the desired domain to GoHighLevel. Once added, you can return to this section and select the domain to publish your sales funnel.
Here’s a comprehensive guide to setting up domains and subdomains for your GoHighLevel sales funnels.
How to Embed Your Sales Funnel into a WordPress Site
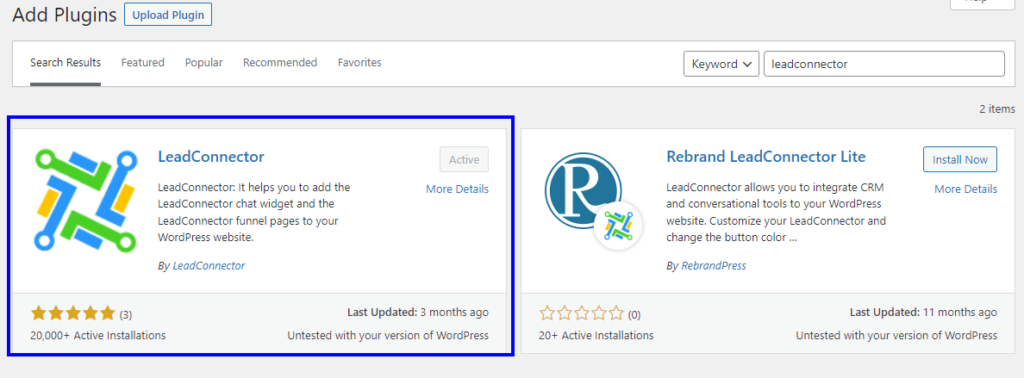
GoHighLevel also lets you publish your funnels directly on your WordPress site using the LeadConnector plugin. To install it, follow these steps: navigate to your WordPress admin dashboard, go to Plugins > Add New, search for LeadConnector, then click Install Now, and finally, hit Activate.
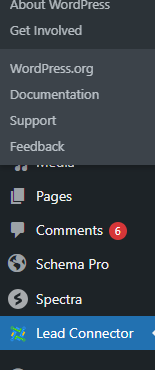
After installing the plugin, you’ll find a new “LeadConnector” option in the left-hand menu. Click on it to proceed.
To use this plugin, you’ll need to submit your GoHighLevel API key for verification. To find your API key, log in to your GoHighLevel dashboard, go to Settings, and scroll down to locate your API key.
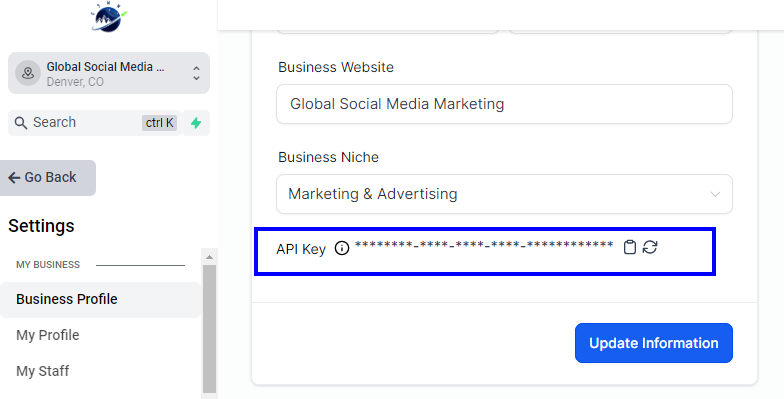
Copy your API key and paste it into the LeadConnector plugin settings within your WordPress dashboard. Then, click “Save” to apply the changes.

Once your API key is successfully verified, you can begin publishing your sales funnel on your WordPress site. To get started, open the Funnels dropdown menu and click “Add New.”
Next, a pop-up will appear, allowing you to add GoHighLevel sales funnel pages directly to your WordPress site.

Select Funnel: Pick the specific funnel you want to publish on your WordPress website.

Select Step: Choose the specific step you want to publish. Typically, you’ll start with the first step of your funnel.
Page Display Method: Choose how you’d like the page to appear on your WordPress site. “Embed Full Page I-frame” is the recommended option. Tracking Code: If you want to use the tracking code you added in your HighLevel funnel settings, check this box to enable it on your WordPress site as well. It’s usually best to keep this enabled.

Use Site Favicon: Enable this option to display your WordPress site’s favicon on the funnel page. It’s generally a good idea to keep this enabled. Enter the Slug: This defines the URL path that appears after your domain name. You can simply use the name of your sales funnel here. Once you’ve entered the details, click “Save Page.” Your funnel will now appear under the Funnels section within the LeadConnector plugin.

From this section, click on “View” to preview your live sales funnel directly on your WordPress website.

How to Add Tracking Codes to Your Sales Funnels?
Go to your GoHighLevel dashboard and open the sales funnel where you want to add tracking. Click on the “Settings” tab, then paste your tracking code into either the Head Tracking Code or Body Tracking Code section, depending on the type of tracking you need.
Once you’ve added your tracking code, click the “Save” button to apply the changes.
Final Thoughts
I hope this guide has helped you understand how to build a sales funnel in GoHighLevel. You can start with prebuilt templates or create custom funnels from scratch. You also have the flexibility to import existing sales funnels or website pages to speed up the process. What we’ve shown here is a basic example, but for our clients, we develop high-converting marketing funnels fully integrated with automation to save both time and resources. If you’d like to take your skills to the next level, check out our GoHighLevel Mastery Course and become a true HighLevel expert!
Having Trouble Making the Most of GoHighLevel?
No worries! Our GoHighLevel Mastery Course is designed to take you from overwhelmed to confident. After working with over 100 HighLevel clients, we’re now teaching entrepreneurs and teams how to use HighLevel effectively and automate their business in 2025. Start mastering HighLevel today with our expert-led course!
Explore the High-Level Mastery Course